Becoming Jyn Erso: All the Rest

Greetings folks,

So in reality I completed this costume on March 23rd 2019.  And I don’t actually have as many photos or footage of the final bits as I did previously. Mostly because this project was very time consuming in a ‘I don’t want to stop to take photos or I will lose my momentum’ type of way.

That being said, I do have some photos and other bits of info, so that is what I will be sharing today.

After I finished the jacket I moved on to making the shirt. I used pattern Simplicity pattern D0795 H5 which did not go super well the first time. The pattern instructions are not super duper clear and the fabric I used for shirt number 2 was awful. So for the third and final shirt I ended up buying a white linen and dying it to the color I wanted.

I don’t have a great deal of photos from the first attempt but I did video tape sections so that is all included here in the video I made for the shirt. It goes into the issues I had with this pattern in greater detail.

Long story short, good pattern, bad instructions.


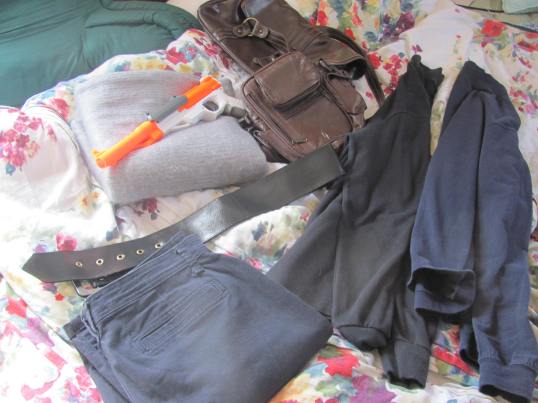
This was also when I did the pants. Now in a lot of ways the pants were the simplest part of this entire process, because they only needed a little bit of alterations. At the bottom of Jyn’s pants she has a little pleating detail, and then a little band of webbing going around half the leg. So I took a pair of pants I found at Goodwill, and some blue fabric and went to town.

Now, I regret not taking the pants with me when I went to Joanns to get the blue fabric because the blues do not match. However, it does not bother me as much as I am sure it should.

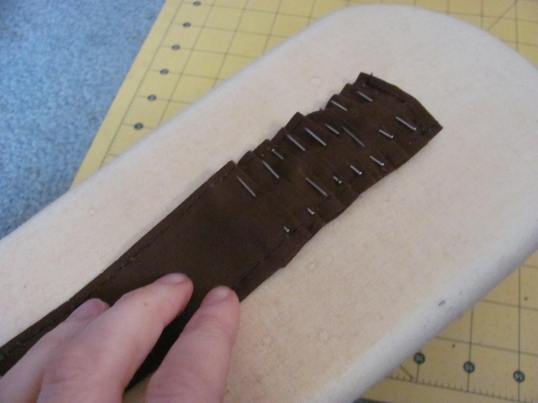
I created the pleat pattern using wax paper first to make sure each leg would have the same number of pleats. Then I cut a rectangle from the blue fabric, hemmed all four sides, and then pleated it down. I also stitched down each pleat afterwards to keep them from flipping up, which is something I wish I had done on my yellow Luke jacket. Then I hand stitched down the entire rectangle onto the pants around the edges. The top fabric band and the grey webbing detail was also attached by hand. So the pants went by super fast. Like I think 2-3 days of sporadic work for maybe six hours of total time.


Now. The most time consuming, physically painful, frustrating thing about this whole project was her vest. And unfortunately…I have almost zero pictures. Because it was an absolute bear to make because I decided to quilt the entire beast. My fingers and hands were marred with pinpricks, my hands cramped a lot and my sewing machine tried to revolt against me not once, not twice, but about four times. For some reason I had enough video clips to make a video about it…but no pictures besides what went up onto my sewing Instagram.

So I will do my best to now explain my processes.

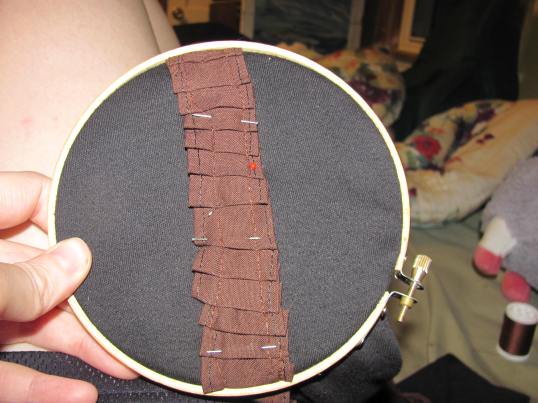
So I used the vest pattern that came with the Simplicity pattern, with some minor alterations. Like adding the collar, for example. Then I took the two front pieces and the back piece and stitched them down onto two layers of brown fleece. Because I always use fleece for quilting/batting/interlining. I then took a thread that was a lighter shade of brown and stitched out the straight lines across the front of the vest in all my reference images. I kept the two vest pieces on the same bit of fleece while doing this to make sure each side had the same number of quilted lines on it and they were all lined up evenly. For the back I marked all my stitch lines out with pencil prior to sewing. Then I cut them free of the fleece, added the pockets and other front detailing, stitched up the sides and added the collar and bottom band. The bottom band was also quilted, but because with only one layer of fleece between the two outer layers. I made the lining with red fabric and boom.


The black ‘wire’ detailing she has on the front of her vest that some people have used tubing for was done with black parachute cord. I tried to use an old cell phone charger at first but I could not get it to bend the way I wanted. But I don’t mind the cord, I like the matte look better then the shine rubber would have had. And then the last picture I have is the collar pattern I drafted. It was cut on a fold, and then folded in half and stitched around the edge before being turned right-side out. Same principal as a waistband mostly.

IMG_2516

The belt and gun holster was made in one day. My sister drafted the holster pattern for me which I appreciate a lot. The belt is closed with four snaps at the hop and then the strap that goes around the thigh is another snap. The clip for the tonfa was handsewn on as well. A lot of small details and hand sewing in this costume.

The kyber crystal necklace started it’s life as one of those crystal points chandelier crystal type things that you get at Joanns. Which is in fact where I got my crystal. To fog it up and make it more natural looking my mother dremeled off all the edges and across it’s entire surface for me. Which was fantastic. And then I snagged some black yarn from my sister’s stash and secured it with a little bit of e6000. I just made the loop big enough to slip over my head, no clasp or ties or anything.

So, I technically still have two very little props to make that go with her vest, the little communicator tube thing and the ident card but for now I am calling Jyn Erso complete.

ANYWAY, here is the vest video from my youtube channel. I might make one more ‘getting into costume’ type video at some point and if so I will make sure to post it up here as well.

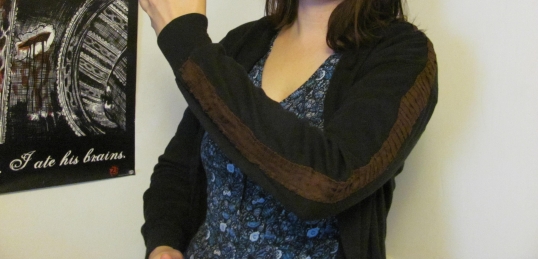
Eventually I will make a post on here of some full body full costume outfits once they are complete, but for now please take these head shots. Thanks.


As always please follow my sewing instagram if you are interested in more regular updates from me regarding my projects, thanks.

Cheers!

Becoming Jyn Erso: The Jacket

Hey, so, like. Do any of you remember back in April of 2017 when I mentioned that I was going to be making a Jyn Erso costume?

Well, I’m making a Jyn Erso costume.

I have actually been working on this costume since I finished the Luke Skywalker jacket in February but due to changing jobs and going through a bit of a rough patch mentally I really didn’t get a great deal of work done on it. And all I’ve really done for it is royally screw up my attempt at her shirt and finish her jacket.

img_2435.jpg

Now this jacket….took an absurd about of time considering how very little I technically had to do on it. It was an altered dark navy blue turtleneck and I only had to change 3 things.

  1. Cut down the front from neck to hem.
  2. . Shorten and hem the jacket so it is at waist level
  3. Add strips of brown pleated fabric to both sleeves.

Guys…do you want to guess what took me a long time to do? If you guessed the pleated sleeves you would be 150% correct. I spent a lot of time on twitter and instagram stories bitching about this jacket with very little progress to show for it. Because it was so hard to motivate myself to work on these pleats. I really don’t enjoy making pleats even though I really love how they look when they’re done.

From neck to wrist was 22 inches. So I needed 22 inches of pleated fabric. So first, I cut out a bunch of inch wide strips of brown fabric that I sewed together end to end until I had two strips of fabric that were 77 inches long. Then I hemmed all four sides a half inch so that in the end the strips were only 1 inch wide. Then I started pleating. But later, I then had to add 16 inches of fabric because with how tight I needed the pleats to be it wasn’t going to make the 22 inches. So in the end I pleated two 93 inch long strips of fabric down to 22 inches, filled with pins like a tiny death snake.

IMG_2424

Then I had to carefully sew these pin filled monsters down as close to the edge as possible so that the pleats would be permanent. This was very slow, I bent so many pins, my thread kept tangling. It was a nightmare. But I managed to sew them all down, free them of their pins and iron the ever loving crap out of them.

As you can see they are a little bit wavy and a little uneven in width in some spots but I wasn’t going to dwell on it. It helps give the jacket a rougher, more ‘been through hell’ type of feel that I feel adds to the authenticity of a Star Wars costume considering Jyn was basically a dirty rebel for the majority of her life. I chalked it up to pre-weathering weathering and went onto the final step.

Handsewing these strips onto the sleeves.

It took a long time, it wasn’t fun because I had to be careful not to sew the sleeves shut as I went. I used a small embroidery hoop which helped out a lot but I still poked myself a ton and it was a slow process.

IMG_2432

But in the end…it was so worth it. I’m so happy with it so far and having the jacket done is really helping motivate me to keep working on the rest of the costume.

IMG_2436

Since I messed up her shirt I went out and bought a pattern for attempt two so I’ll talk about that more in another post. I’m making (really rather shitty) youtube videos about this process too, but I am going to link to those on this blog only after the costume is done.

Check my sewing instagram for more frequent updates. 

Also??? I’m just not going to apologize for / comment on the time between my posts anymore.

But yeah, thanks for checking in friends.

Cheers.

Luke Skywalker: The Jacket

Friends, I finished the Return of the Jedi jacket. It isn’t perfect because the fit in the shoulders is just a liiiiittle bit off and it is a tad short but I don’t even CARE! I love it, it feels so good when I wear it and it makes me so giddy. So lets get into how I got this monstrosity done!

It is truly a deceptive garment. It seems so simple and yet…AND YET.

The first thing I had to do, after ripping off the sleeves and fixing the one that I sewed backwards was to take in the jacket at the shoulders. After a lot of fussing I discovered that the shoulders were too long by three whole inches on each side of the garment. Even the smallest possible size of pattern was made for shoulders significantly broader then mine it seems. I measured three inches in on each side and carefully trimmed away the excess fabric on the front and back, following the pre-existing curve of the armhole. Which meant that I didn’t take away any of the width from the lower torso area, and I didn’t change the size of the armholes. So I could still accommodate my bust and I got to avoid altering the sleeves any further. A win win.

Next, I sewed up the lining and stitched it in. Now, originally I was trying to be really fancy and have an invisible closure for when I didn’t want the silver to show. I bought the worlds tiniest blackest button and then I tried to add an invisible loop using fishing line. The hope was that when the jacket was open the closure wouldn’t be noticeable. Unfortunately the line slipped out while attaching the lining because it is thick and waxy. So as of now I can’t not show the silver lining, which is fine since the silver bit is kind of iconic anyway. But I am still a littler frustrated that I wasted the time and materials on trying.

IMG_2384

With the lining in the next thing to do was sew up the opening at the bottom and attach the loose bit of lining to the outer shell’s armholes. Because I am a savage who was very frustrated with this jacket…I didn’t make lining sleeves. I just sewed the lining armhole to the outer armhole and left it at that. I will probably go back later and hem it in bias tape to keep it from fraying but for now that is how I intend to leave it. I hemmed the bottom edge using my invisible zipper foot after turning the raw edges in by eye. Now…I have to admit that I did not trim the edges down so they were even before I did this. I just went as is…which meant that in some spots the hem is now  a little wavy. I do this to myself….I know but I really just wanted to be done. I was at the point where if I didn’t finish the project soon I was going to just end up hating it. And I really didn’t want to hate it, seeing as it is my favorite Luke Skywalker outfit period. So I made do. And in the end it all worked out fine. I might go back later and put in an extender panel at another time but for now, I am happy with it.

The very last thing I did was hand sew in all of my closures. I used four hooks and bars on the lower opening near the stomach, and two snaps up at the collar to keep everything closed. I’m still debating on if I need that second snap or not, I might get rid of it. We shall see.

So with that the bulk of the costume is done. All I need now is to alter the belt to include all the silver bits and get a better glove. But those are such small things that I probably won’t make a whole post about them. But keep an eye out for when I post finished photo shoot type photos!

If you want to see my struggle in semi-real time (but actually stretched out over a bunch of months) please feel free to watch this really nonsensical video here.

Cheers!

Medal Ceremony Luke Skywalker

So. My Return of the Jedi Luke Skywalker costume is still tragically stalled. Though not because of frustration because I have actually figured out a solution to my fit issues. No it has mostly been kept on hold because of other real life responsibilities and also because I decided to make a whole different Luke Skywalker costume for my cousin’s wedding.

You remember, the wedding from my last post. The one about the Endor Poncho. Yeah, that one. Anyway,

To be more wedding appropriate I decided to make the outfit Luke wears at the medal ceremony at the end of A New Hope. Which is something I had been wanting to make for YEARS so it was a great excuse for it. I absolutely love this outfit. In particular, I love this stupid yellow jacket.

luke_skywalker_yellow_jacket__09952_std

I love the color, I love the stupid pleats that run from shoulder to elbow, I love how ridiculously poofy it seems to be, I love that like a goober he wears it with black and brown. I am just tragically attached to this look. As evidence by how often I lament about it on twitter. So my cousin’s wedding was the perfect excuse to finally sit down any make it.

Now, I thought this was going to be easy. I was wrong. It was deceptively complex. Like the poncho ended up being. But let’s just get into the nitty gritty details then.

So, I am fairly certain that the actual jacket worn in the movie is either a leather or a thick canvas material. I didn’t want to use either of those things. So what I did was I bought my favorite fabric ever, quilter’s cotton, for my main fabric and my lining fabric. My tan accent fabric is also quilter’s cotton. I just love the color variety I get with quilter’s cotton and it’s easy to work with and I don’t care if it wrinkles, I love it. I also bought yellow fleece to sandwich between my layers to create the poofy volume. It turns out at JoAnn’s they accidentally had two slightly different shades of yellow on the same bolt so parts of the jacket are actually different colors. But you can’t tell on the finished garment so its all fine. It is. Its fine. I also originally got interfacing for my collar piece but didn’t end up using it. The pattern I used for my base was a bomber jacket pattern, Simplicity 8418. It was the right basic shape and was very easy to alter.

IMG_2354

I bought the pattern to make an oversized red varsity jacket for another costume project so for Luke I actually traced the pattern at it’s smallest size onto wax paper. Which was very easy and super satisfying for some reason. It also meant I could leave out the lower jacket band and the wrist cuffs. I would later have to make cuffs of my own to sew onto the jacket because the sleeves without them were just way too short. But that’s later.

Next I had to make the pocket that is on the front of the jacket. Which I had to make totally on my own with no pattern because the bomber jacket doesn’t have a front welt pocket. So that was fun. There were no instructions on how to do it in my sewing book which was distressing but I watched about six different youtube tutorials and figured it out. I am very happy with how nice it turned out. It fit my phone perfectly, which is really the only thing I can imagine ever really using it for.

I apparently don’t have pictures of the process of making my little tan arrow like appliques for the front of his jacket but I just made tubes with pointed ends, turned them right side out so the raw edges were hidden away, ironed them flat and then temporarily attached them with this like…sewing glue stick? I got it in the notions section of JoAnn’s. It was actually pretty helpful. Then I topstiched around the edge using my invisible zipper foot so I could get right up on that edge.

Next came the single most difficult part of this entire process, which was the sleeves. Or to be more exact, the pleating details on the sleeves. I decided that the best way to go about creating them after looking at an obnoxious amount of screenshots and replicas was to create, essentially, two long yellow pleated pot holders which I then sewed onto my jacket sleeves before they were sewn to the main body of the jacket.

This worked out really well! It also took literal hours. And was the source of several hand cramps and iron burns. (I actually used my iron a lot during the whole process of making this jacket and I am super proud of myself because I can almost never bring myself to use it.) Originally my sister made me a beautiful pleating board out of poster board to use so the process would be quick and easy. Unfortunately, the pleats ended up being too big. So I sat down and hand pleated both strips of fabric by eye. It took about an hour per side to pleat and I used an obnoxious amount of pins. But they look so, so good so the whole thing was worth it. I bound the edges in home made bias tape and sewed them suckers on.

65 inches of material pleated down into 16 inches. Twice.

But once that was done the rest of the jacket was a literal breeze. I sewed the collar which I had to alter a little bit to be bigger since I wasn’t using a rib knit stretch material so the pattern piece was super small. I ended up just measuring how many more inches I needed, halving that number and then placing the pattern that many inches away from my folded edge. Easy.  I also ended up not using the interfacing I bought because it was way too stiff. I attached the lining, bound the raw edges of the jacket opening with tan fabric bias tape and then made some cuffs. The cuffs were made by measuring the sleeve, cutting out a huge rectangle, sewing fleece to one half of said rectangle, folding it all in half and stitching that sucker on. Boom. Done. Childhood fantasy goal achieved.

The rest of the costume was super easy because it’s just simple clothes. I got some brown pants from Goodwill, I already had a long sleeved black top, and the boots are the same boots I got from a thrift shop for Return of the Jedi Luke. And the lightsaber I used is my actual Luke Skywalker lightsaber toy that I have had since I was like…five or six years old. I love and treasure it. I don’t have a blonde wig for this costume at the moment so I just threw my hair back in a ponytail and made do.

I’m not going to show you any pictures from the wedding because I’m not comfortable putting my family out there like that. HOWEVER, I do have photos of me in the costume that my sister graciously took of me.

In my next post I will have some pictures with my lightsaber, those just need some editing at the moment. Also I will show you my mom’s Leia Endor Poncho because it is now all dyed and it looks great! She did a phenomenal job on it.

Thanks for reading, I feel like this was a longer post then normal. Until net time,

Cheers.

Luke Skywalker: The Struggle

Hello friends, I come to you with some tales of my woes. Surrounding the love of my life, Luke Skywalker’s Return of the Jedi costume. So no rambling today, lets just get into it.

f0fd599f5e708c8c8c456048e973f7c7

So the pattern I used was a McCalls Mens pattern. Which is truly where the problem all begins. I cut out the smallest size option possible and decided, yeah, this will be fine. I held the pattern pieces up to my body and eyeballed it. Without pausing to take and exact measurements of things like the shoulder seams. I really have to stop eyeballing things. I know better. Anyway the fabric I used was a lightweight black cotton suiting.

I used jacket view B with some minor alterations, being that I didn’t add the extensions at the bottom. Luke’s jacket stops at his waist so I didn’t need them. I cheated when it came to the collar because it had to be cut on the fold since I needed two of them by folding the fabric an additional time which meant I only had to pin once, but I had to cut through four layers of fabric to do it. I hate pining that much.

Now in the movie Luke’s jacket is lined in silver. But I didn’t want to buy a whole lot of silver fabric since only a little bit ever shows. So I cut all the lining out of the same black cotton suiting and purchased a little roll of silver remnant fabric for the front part that folds over. Which is currently attached to the front lining piece and looks great, by the way. Also by this point I gave up on pining and started using random objects as pattern weights.

I then assembled the outer shell of the costume, and everything was going really well. I made the sleeves and attached them, and then started sewing the lining together. And then I realized that I had a major fit issue. You see when I was trying on the jacket without the sleeves I noticed that I had a bit of extra room in the shoulders, but I figured that the seam allowance for the sleeves would solve that. I was very wrong. So when I tried the jacket on with the sleeves attached I discovered that my shoulders are not broad enough to fill out the jacket. The shoulders dropped over the edge of my shoulders and the seam was hanging down at like…tee-shirt sleeve hem level. Not a very attractive look. So I had to rip off the sleeves. And now I am stuck trying to figure out what to do. Because unfortunately this isn’t as simple as just taking the garment in a few inches to fit. If I took it in like I would any other garment, it would be fixed in the sleeves but become to small in the side seams. So I have to do a lot more fussing with it, I will probably have to adjust the front and the side front pieces and then also adjust the size of the sleeves to fit the new armhole size. Which I am not looking forward to at all. I’m just really happy I realized the fit issue BEFORE I finished constructing the lining and sewing it into the jacket. Because otherwise I would have had to re-cut the entire jacket out from scratch and started all over. Which probably would have driven me right up the wall.

I don’t have any photos of it because I was really embarrassed by not realizing my mistake sooner. But I do have video of myself laying on the floor on top of all the jacket pieces lamenting over this disaster. It’ll all be going into a youtube video later. Maybe.

So since I am feeling rather defeated at the moment by this jacket, I shifted gears a little bit to focus on my Jyn Erso costume. My dad got the digital version of Rogue One so we watched that on Friday and it reignited my love for her. A lot of the costume is going to be altering pre-existing materials, so I went on a shopping trip to Goodwill today and got a great amount of things.

IMG_2263.JPG

One of those turtlenecks will be altered into her shirt and the other into her jacket that she wears. I have a top that I am going to pull apart to make into the pattern for her vest, and I already know how I am going to alter the bags and the pants. The only items I still need to purchase for Jyn are the boots, gloves, and little bits of trim I need to alter finish detailing the jacket. So hopefully I will have her done very, very soon.

Once the weather gets nicer and there is more greenery about I will be getting photos of Odette so please stay tuned to see those. If you want more frequent updates on my projects, please follow me on Instagram at HexxSews where a lot of times I post directly to my Instagram Story about what I am doing at the moment.

Well that is it guys, I hope to be back soon with either a triumph over Luke or more progress on Jyn. Until next time, Cheers.

Improv Reversible Skirts & Embroidery

Welp it only took me until March but I remembered I should update you guys. I swear I think about this blog a lot, I just really don’t have the time to sit down and update it. Between work, house responsibilities, actual sewing, writing and my other hobbies I just never seem to find the time to write a post. But hopefully as I get more and more things done I will be more and more excited to blog about them.

ANYWAY, let’s get into what you are all actually here for, which is the sewing progress. This post is actually probably going to end up being a bit long so maybe that makes up for it taking so long? Yes? No? Okay.

So the first thing I want to talk about is the bigger project. Which is a skirt I am making for my sister. It is at this point 98% done, it is just waiting to be shortened because I made it WAY too long and it needs to have a drawstring threaded through the waistband.

But this project was a lot of fun and a lot of trial and error. As the title of this post suggests, it is a reversible skirt. Which is something I have not made before, I have never made anything reversible before. But I had an understanding of the concept and decided to try it out anyway. And I am happy to say that even though a lot of things went wrong during this project, the reversible aspect of it came out right! Also I think I used my iron the most during this sewing project then I have have before. Usually I do my ironing after the garment is made unless I am making things like waistbands or bias tape. Which I know is not proper seamstress behavior but I just don’t get along with my iron. But I did iron ever single seam of this project after it was made to set it and help keep everything flat and where it belonged. So yes. Anyway, onto the skirt.

My sister (and I) love the Legend of Zelda franchise so of course the fabric she purchased for me to use was two different LoZ prints. One of which I have worked with before when I made my 1960s inspired sheath dress.

So for the basic construction of this dress I was following along with this Rectangle Skirt tutorial. But seeing as I planned to make the skirt reversible I had to break off from the tutorial around the time the waistband and the zipper got involved.

So I cut each fabric into three long squares and sewed them together so I had two very long rectangles. Then I placed them right sides together, matching all the seams, and sewed around both sides and the bottom. After I trimmed the seams and turned the whole thing right side out I top stitched around those three sides again.

Now this created a perfect hemmed edge, but unfortunately what I didn’t realize at the time was that the skirt was way longer then originally intended. Which means I will have to do a new hem later. But it was beautiful and easily done while it lasted!

I then sewed the top edge shut and gathered the skirt down from hand before making the waistband. Which I made in a similar way to the skirt to make sure it was also reversible. HOWEVER I wasn’t planning on putting a zipper in but instead making the skirt into an elastic waistband. So I only sewed and top stitched the top edge of my waistband, leaving the other three ends opened. This meant I was able to sandwich my  gathered edge of my skirt into the waistband so all my raw edges were sealed away. And the ends were open so that I could thread the elastic band in later. We’ll come back to the waistband in a little bit, because the next thing I did was the seam. Given the nature of the skirt, I was left with only one seam to sew up. Which I chose to sew with a French Seam. This meant all the edges of the garment were finished and it was reversible. The last thing I did was insert the elastic into the gap left in the waistband before I hand stitched it closed.

But the skirt was unfortunately not as finished as it appeared to be. The fabric itself didn’t have enough stretch to it to accommodate the elastic so my sister wasn’t able to get the skirt on or off without help. I think when I measured the elastic around her waist I might have also made it too short to be comfortable. So I had to rip the elastic out. I decided a drawstring situation would be best, and she could knot the ties at the waist for a cute detail. So to make sure she could get the garment over her hips I undid one of my side seams a few inches to create a comfortable opening. I hand stitched all the openings so it was all closed up again. And more importantly the garment remained reversible. ((I’m really proud that it’s reversible, can’t you tell?)) I am going to use the excess fabric I have left over from shortening the skirt to make the drawstring. A) so that I am not wasting fabric and B) so the garment is still uniform.

BASICALLY as far as I see this project, for everything that went really well something else went really wrong. But as it is it is nearly done and nearly perfect. So by the next time I make a post I will hopefully have pictures of the worn garment for you.

Onto my next project which is actually an ongoing process and has been very time consuming. I have taken it upon myself to hand embroider patches for myself and three of my very best friends for our jackets which we are fondly calling out ‘girl gang jackets.’

img_2223

I designed the patches myself, using public domain clip art and a lot of fussing with angles and fonts on Paint.net. We call ourselves the Coffee Crew so I made sure that the group name was incorporated. Each patch will be identical except for the last names, of course. They will also differ from patch to patch given how iffy my hand work is at times. It isn’t easy when you have underdeveloped hand muscles and get wrist fatigue super easily. The patches are a bit bigger then I imagined they would be but I have fully committed to the size. So I have nobody to blame for how long this is taking except for myself.

I have one patch completely finished and a second has been entirely outlined. I’m in the process of filling in all the white space. I will eventually be covering the back of the patches with fusible.

The last thing I want to touch on in this post is some of the things I have purchased to go along with some of my cosplay projects. Because as I have learned from doing theater work, altering items to suit your needs is a life saver.

So the things I have bought are:

  • Spikes and pyramid studs for my orig. Raven design.
  • A nerf gun to paint and alter into Jyn Erso’s hand blaster.
  • Space leggings for Solgaleo
  • A sleeveless black turtleneck for Solgaleo and Luke Skywalker
  • Overall shorts for an orig. Daredevil design for Free Comic Book Day

So anyway, thank you again for checking out my progress. I know it isn’t the most coherent but I don’t like working linearly on projects if I don’t have to. Working too linearly can stress//burn me out which is not something I want.

See you next time, which will hopefully be a lot sooner then three months. Cheers!

Cosplay Plans for 2017

2016 was busier then anticipated and I can honestly say that 2017 might be just as busy. However this will not stop me from attempting to complete a bunch of projects! Because my list of costumes to make is rather long (a couple of pages actually) and it will only keep growing if I don’t get something done.

So I thought I would list here my major costume goals for the 2017 year. I might make one or two other things that I won’t be included in this post but the pieces in this post are my main focus for the year.

(I am also not including costumes that I started in 2016 and will probably end up finishing in 2017 either.)

And of course when I start each project I will go into more detail on them in their own posts. So if you have any questions regarding any of the outfits, leave them bellow and I will answer them when I start working on the looks

So after all that rambling, lets get to it.

  • Luke Skywalker, Return of the Jedi, Black Outfit

f0fd599f5e708c8c8c456048e973f7c7

So, I have a deep rooted connection to Star Wars. It was really big in my family, and we used to watch the films together frequently. We played the video games, read a few of the books, and had several light saber duels in my Grandparent’s back yard. And needless to say, Luke Skywalker was my favorite. In fact, Luke remains to this day one of my all time favorite fictional characters. And because of this, I have always loved his costumes.

In the end I plan to cosplay at least three different versions of Luke, but the one I plan to be working on in the year 2017 is his all black outfit from Return of the Jedi. It is easily my favorite look. Super sleek, super powerful without being overtly intimidating, and a big FU in the face of the Sith aesthetic.

I have actually worn a really slapdash closet cosplay version of this outfit for Halloween one year in High School. Unfortunately I don’t have any pictures because I would love to do a ‘then vs now’ type of thing. But I do have most of the pieces I wore so if I can round them all up I still might do something of the kind.

For this project I already bought the pattern I would need for the jacket and the majority of the fabric. Somewhere I already have the perfect glove.

  • Jyn Erso, Rogue One, Vest Outfit

Two Star Wars costumes in a year is not excessive when you understand just how important Star Wars is to me and my family, alright?? When my Uncle got married the whole bridal party (myself included) walked into the reception to the main Star Wars theme. I have seen every Star Wars movie that has been released in my life time in theaters at least once, some more then once. Rogue One was no exception.

And listen, I could talk about Rogue One and the characters all day. For a couple of days probably. It was so good and I loved it so, so much. But I will not digress into that here. That’s what websites like Tumblr are for. But I will say that I have never loved a character so fast or so hard as I love Jyn Erso. I feel a real and true kinship with her in my being to the point that it hurts. Physically hurts.

Jyn has a couple of looks in the movie but I think I am going to be sticking to her blue shirt with a brown vest look that she sports for most of the movie. It’s the most aesthetically pleasing to me.I might make her jacket that she sometimes wears with this outift and the scarf if I have the materials. Because so much of this outfit is similar to existing garments, I am planning on thrifting the majority of the pieces and altering them. Because of this, Jyn might actually be the first costume I get done in 2017.

I don’t mean to say she will be an easy outfit, because there is no guarantee that I will find the things I need to make her costume. Which would mean having to make some things by scratch, which would be a bit tedious. And her gun prop is going to give me a little trouble since I am wretched with props. But I will be using 90% of my real hair for this look, which will be interesting. The only thing I will need is a fake hair piece to make into a bun because I like to keep my own hair on the shorter side.

  • Solgaleo, Pokemon Sun, Original Design

cover12

Pokemon gijinka costumes are something I am fascinated with. People come up with such amazing designs. I myself have recently taken to drawing out a few for myself, one of which is also Art Nouveu inspired.

However my big project of 2017 as far as Pokemon is concerned is a gijinka inspired by the Legendary Pokemon Solgaleo from Pokemon Sun. I am enthralled with it’s look and when I first saw it I knew I had to do something with a sci-fi twist to it.

The outfit I designed is very much a Treasure Planet and Star Trek infusion. Space Military is what I am going for.

This project is also exciting because it will be my first venture into making armor. Because the arms and legs will have mech like armor on them. This garment will also include a massive applique which I am nervous about. But very excited. This project is going to be visually the most beautiful of my planned costumes, in my opinion. I will be using the same pattern I have already purchased for my Luke Skywalker costume, with some major alterations.

  • Edith Cushing, Crimson Peak, Nightgown

So Crimson Peak is an amazing movie, I refuse to let anyone tell me otherwise. I love the aesthetic, I love the acting, I love the plot. I love it. All of the costumes are so beautiful and I wish I could make every single thing that Edith and Lucille wears. Who knows, one day I might.

But what really pushed me towards making this outfit was when Cosplay by McCalls noticed me struggling to find vintage patterns to alter into Edith’s nightgown and just released one. Which I bought. And am so thankful for. It will still need a bit of alteration because the sleeve puffs are not large enough in my opinion, but it is an ideal base to work from. So now I just have to decide if I will keep the dress pristine when I finish it or if I will dunk it in red dye to be faux blood to give it the ‘end of the movie’ look. Decisions, decisions.

And that is all I have for this post today folks! I know four costumes doesn’t seem super impressive given we have 12 months in a year. But I know I am not the fastest sewer in the world, and I already know I will be taking all of November off of sewing to do NaNoWriMo next year. So four costumes will have to do for now.

Hopefully I get more done then just this, but these are my priority. Where most of my budget and planning will be going. So wish me luck friends! And I hope you all have success in your 2017 sewing plans.

If you are interested in seeing (hopefully) more frequent updates to my sewing adventures, please feel free to check out my sewing instagram: Hexxsews

Cheers!

Swan Princess Odette pt.3

This dress really isn’t that complicated, I have nobody and nothing to blame for how long this is taking except for myself. I have had these pictures sitting here waiting for this write up for a fair bit of time and I just haven’t been able to get around to it until now. Technically this project is in the ‘done’ stages because I only have two things left to do on this costume.

In my last post I said I wanted to be done this costume by September. Technically I succeeded in that because textile wise it is just all the extra bits that are holding me up.

So lets just get into it,

The first thing that I did was attaching the sleeves to the body of the dress. I pinned and sewed the bottom half of the sleeves on first and then carefully pleated the top to fit. Then I pleated the other sleeve on so that the pleats were identical. This took a fair bit of time, but was so worth it. Then of course I sewed them on.

And once I had the sleeves on I was uncontainable in my joy. I was beaming from ear to ear, unable to stop. I got my sister to take pictures of me in the dress and I took an obnoxious amount of said pictures.

The next step was to add the neckline. Now in the movie Odette’s top has a slight sweetheart neckline shape. I chose to forgo that shape because of how low the neckline was already laying on me. Since the dress is already seamed differently from the original dress the sweetheart neckline with princess seams would have been a little bit risque cleavage wise. I created some bias tape for the neckline and pinned it on securely.

The next thing I made was the sash for her dress, which I lost the pictures of. I sewed a long strip of green that got larger towards the bottom and tappered into a sharp angle. I then sewed that piece to a piece I had made that fit my waist. The waistband piece tapers into a V at the front. It closes with two snaps. Easy!

The last thing I had to do with the physical dress itself was hem it. Which was a bummer because I was super not looking forward to hemming two huge skirts. I was really sort of lazy with the lining hem. I just did a double folded hem as I went on my machine by eye. My bobbin wigged out on me and it was quite frustrating, the hem is slightly uneven. But since it is lining it doesn’t really matter.

So for the outer portion of the dress I ran into a tragic issue. My lining, even after being hemmed, was longer then my unhemmed outer fabric. Which left me confused and more then a little bit angry about the whole dress. But I sucked it up and figured it out. And the answer I came up with was bias tape.

I created strips of bias and pinned it to the whole bottom of the skirt while the dress was on my dress form inside out. The lining fabric was pinned up about the waist so it didn’t get in my way.

I ended up making way more bias tape then I needed, which is a bit frustrating since for most of the strips I didn’t have my iron with me I was finger pressing the bias. Which is rough on my fingers, let me tell you. And once that was pinned on and stitched down my dress was done. DONE I SAY!!

The sleeves actually look pretty ridiculous and slenderman-ish when not being worn.

This is a very long post guys, I hope you’re still sticking with me. I only have a little bit more to go. Now let us move on to the locket because the locket is a key part of this costume.

I couldn’t find a gold locket charm so I settled for buying a silver one and painting it.

This slideshow requires JavaScript.

I need to get a gold chain for the costume, right now I have the necklace on just a random silver chain I found in my drawer. I am going to maybe add a picture to the inside of the locket at a later date. Not 100% sure on that bit yet. So with the locket all finished up all I have to do is make the broach thing that goes onto the center of her sash and get the wig into a decent looking place.

Hopefully that will all be taken care of soon so I can work on other things. I want to start my Return of the Jedi Luke Skywalker costume really soon, I have the pattern and the fabric for it. Just need the time.

Also please enjoy some pictures of a dress I made in like 3 days for the Ren Faire. I didn’t actually get to go to the faire but I really like my dress!

Alright, thank you so much for the patience and interest. Cheers!

Swan Princess Odette pt. 2

SLEEVES! This whole post, (well maybe 99% of this whole post) is about the sleeves for my Odette dress. They are not exactly what I imagined them to be but I am thrilled with them.

In my last post I detailed out how I made my pattern for the sleeves. This post is about constructing them. It took me a lot longer then it should have to be honest. In the two months since my last blog post I have worked on them for maybe a total of six hours. This is due to being tired from work and busy with friends and family. If I had buckled down and just powered through I would have had em done in July. But they are done now, and my dress is rapidly hurdling towards completion! So lets just jump in.

So to add volume and structure to the top of the sleeves I decided to line the upper puff and interface them. So I put the interfacing on the white fabric, sewed em together and then attached them to the first cuff band. I chose to use pleats instead of gathers to fit the sleeve to the cuff because I feel like it will help maintain the volume.

The next thing I did was add the lower half of the sleeve to that cuff. At this stage I also hemmed the bottom of the sleeve because it was easier to do it now while the fabric was laying straight and flat, rather then when it was in a tube.

The next step was to make the elastic casing and then attach those to the sleeves. Each casing was stitched very carefully on just the edges so the white and green fabric created a snug tube for my elastic to be threaded through.

So then I was ready for elastic. I used two different widths of elastic. The upper cuff band uses a wide band of elastic and rests directly against my skin. This was pinned carefully into the sleeve and attached with two rows of machine stitching.

I then threaded the thinner elastic into the casing with a safety pin and then hand stitched each end of elastic to the sleeve so it wouldn’t twist or fall out. Then I folded the sleeve in half right side together and sewed it up.

Here was where I hit a snag While the sleeves are clearly identifiable as Odette’s sleeves, they lacked the volume she has in the movie. And it was really obvious down around the wrists.

After a bit of planning, I decided I was fine with the middle segment of my sleeves not being quite as big as my reference images. It looked a little more balanced for my actual, human body. But the wrists were unacceptable. But I didn’t want to redo the whole cuffs. So the only solution I could come up with that didn’t require me to pull the sleeve apart was to add in godets.

I put in two godets per sleeve, and I hand stitched them in because of how tight the elastic at the wrist was. It is a little odd looking if you are right up close to them, but totally unnoticeable from a distance. And I have much more room for my hands now!

I also got my wig, but it didn’t come with a wig cap like it said it would so I haven’t really done anything with it yet. But this means all I have left to do on this dress is attach the sleeves, the belt, neckline, accessories and hem! If I can be done this costume by September I will be the happiest costumer ever.

And to end this post, I just thought I’d toss in another project that I made that I am super proud of. It is just a simple 1920’s inspired jacket and I adore it.

So that is it, thanks for stopping by guys! And if you have any interest in seeing some more in-process pictures, please follow my new sewing instagram.

Cheers.

Swan Princess Odette pt.1 and Mini Update

So I have resigned myself to the fact that the camera that has all my work in progress shots from the production of Henry V that I costumed last year just isn’t going to cooperate. I have had a half finished blog post written for MONTHS at this point that was just waiting for those photos but it isn’t going to happen. Which is a massive bummer. But I will make a post about the finished show since I am still really proud of all the work I did on it even though it was a modern setting…and all the quick changes I accomplished!

So anyway, I decided to move on and show you some of the things I have been making recently. As well as my current, BIG project.

I made a circle skirt for an old coworker using some Legend of Zelda fabric that I don’t have pictures of, but I also made a Legend of Zelda dress for myself using Windwaker fabric. Which I absolutely adore. I used Simplicity Pattern 1609  that called for six freaking darts but I still love the dress. (It’s listed as a ‘Jiffy’ pattern if you are looking for it)

I also made a galaxy print dress from a lovely quilters cotton with no pattern what so ever.

tumblr_nt1t6jtnew1qblb9ho1_500

Isn’t it a delight? It comes to just above the knee. The waist is a bit wonky but for  dress I made in one evening with no pattern I am THRILLED.

Alright, moving on to my main project which I had posted about months and months and months ago, making Odette’s white lake dress from the animated movie the Swan Princess!

4155384_std

( A lot of these photos are pulled from my posts on Cosplay Amino, an app I don’t really use anymore because it just didn’t agree with my phone. )

The fabric I am using for the dress is muslin for the lining, a printed quilters cotton that is white with some very tiny ivory floral detailing, and two different shades of green in quilters cotton. I know quilters cotton doesn’t have a lot of stretch and give to it, but I love working with it because of the range of colors and patterns it comes in. I can often find exact colors I need in quilters cottons much easier then I can find anything similar in the fashion fabrics. Quilters cotton isn’t for everyone in clothes making, but it is for me!

details

My Outer Fabric

The pattern I am using for the base dress is Simplicity 4940 in view A but without the collar or the sleeves. This pattern has two seams down the front rather then one center seam like in the reference photos. This is an inaccuracy I am doing purposefully because the two seams are more flattering on my body then a single seam would be.

The pattern doesn’t call for a lining but I needed to add one because the top layer would have been too sheer. So with the exception of the back I sewed with a much smaller seam allowance so the dress could still be taken on and off. Because I am a bad seamstress who likes to not follow the rules my teacher taught me in high school, the dress has been sewn without me pining 93%  of it.  Also, because I hate zippers, I decided not to put one in. This makes the dress a bit snug getting over my breasts at the moment but I am happy with my decision. And if I have to insert a zipper once I add my sleeves, I have the seam allowance in the back necessary to do so.

Like look at this, these pins at the neck when I was attaching the outer fabric to the lining fabric is the most pins I have used at this point in the project. I am a bad seamstress, don’t be like me.

neck

My seams are all pinked because my serger and I had a fight but I am super pleased with the dress. It is a bit heavy because of the quilter’s cotton but I knew that going in.

BUT! IT PASSES THE TWIRL TEST!

So for Odette’s crazy sleeves I drafted my own pattern. After looking at tons and tons of reference images I realized that her sleeves were a strange Bishop Sleeve/ Puff Sleeve combo. So, I took inspiration from the instructions on Simplicity Pattern 1728 on how to go about achieving the look.

I started by doing extensive reading on how to create puff sleeves from existing patterns and found this tutorial to be SUPER useful.

So now that it is all drafted I have just a few more things to work on:

  • Adjust the armholes on the dress because they are tight
  • Cut out and construct the sleeves
  • Attach the sleeves
  • Alter the neckline shape into a sweetheart shape
  • Attach the green neckline binding
  • Create the green belt
  • Hem
  • Create the locket
  • Purchase the Wig

…so it seems like both a lot of stuff left and not a lot of stuff at the same time! Oh boy, I really hope to have this project done by September.

I am still also working on my Punk Rock Raven design, I might make a post about that in the near future so be on the look out.

Anyway thank you for your patience with me, and your time!

Cheers!